 JavaScript模块化篇
# 1. 什么是模块
- 将一个复杂的程序依据一定的规则(规范)封装成几个块(文件), 并进行组合在一起
- 块的内部数据/实现是私有的, 只是向外部暴露一些接口(方法)与外部其它模块通信
编码时是按照模块一个一个编码的, 整个项目就是一个模块化的项目
# 2.各种方式的模块化
1.全局function模式(原始写法)
- 直接将需要声明的变量写在全局中
- 缺点:污染全局,容易命名冲突/数据不安全
function foo1(){}
function foo2(){}
foo1()
foo2()
1
2
3
4
2
3
4
2.namespace方式
- 将需要声明的变量封装到一个函数中
- 解决:命名冲突,减少Global的变量数目
- 缺点:本质是对象,外部可以直接修改模块内部的数据,不安全
let module = {
    foo1(){},
    foo2(){}
}
module.foo1()
module.foo2()
1
2
3
4
5
6
2
3
4
5
6
3. IIFE方式
- 通过闭包的方式,只暴露想要暴露的数据或方法
- 函数是唯一的local scope
let Module = (function module(){
    var __private = 'save now'
    function foo(){}
    return {foo: foo}
})()
Module.foo()
Module.__private    //undefined
1
2
3
4
5
6
7
2
3
4
5
6
7
4. 引入依赖
- 通过给闭包函数引入参数的形式来传递依赖
- 这就是模块模式,现代模块化的基石
let Module = (function module($){
    var __private = 'save now'
    $('#test').hide()
    function foo(){}
    return {foo: foo}
})($)
1
2
3
4
5
6
2
3
4
5
6
# 3. 为什么要模块化
- 现代网页更像一个web app
- 代码复杂度逐渐上升
- 需要高解耦性的js文件
- 需要部署一种最大优化http数量的网站

# 3.1 模块化的好处
- 避免命名冲突
- 更好的分离,按需加载
- 更高复用性
- 高可维护性
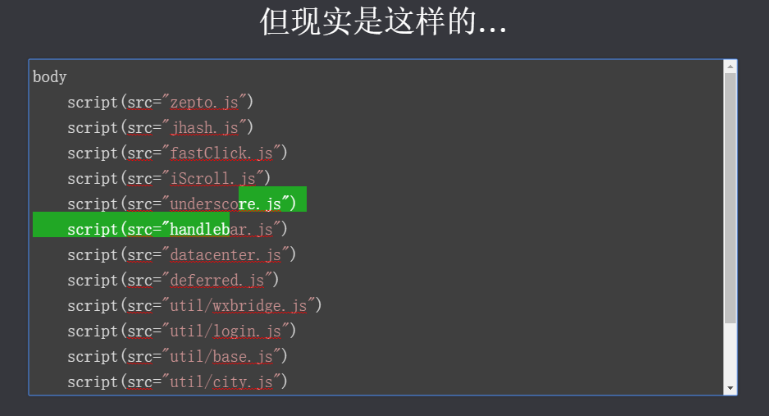
# 3.2 潜在的问题(页面引入script)
- 提高了http数量,降低网站性能
- 引入顺序改变会导致报错
- 依赖关系模糊
- 难以维护

# 4. 模块化规范
# 4.1 CommonJS
- 每个文件都可以当做一个模块
- 在服务器端: 模块的加载是运行时同步加载的
- 在浏览器端: 模块需要提前编译打包处理
# 基于服务器端(Node.js实现)
文件目录:
project
  |---modules
  |---node_modules
  |---app.js
  |---0package.json
1
2
3
4
5
2
3
4
5
基本语法
1.定义暴露模块 : exports
exports.xxx = value
module.exports = value
1
2
2
2.引入模块 : require
var module = require('模块名/模块相对路径')
1
# 基于浏览器端(Browserify实现)
- Browserify也称为CommonJS的浏览器端的打包工具
- 官网地址为Browserify (opens new window)
文件目录:
project
  |---js
      |---dist         打包后的文件目录
      |---src          源码所在目录
          |---modules
          |---app.js
  |---node_modules
  |---index.html
  |---package.json
1
2
3
4
5
6
7
8
9
2
3
4
5
6
7
8
9
使用Browserify打包,使用的命令顺序如下:
- npm install -g browserify
- npm install --save-dev browserify
- browerify src.js -o destination.js
# 相关问题
问:引入模块发生在什么时候?
- Node : 运行时, 动态同步引入
- Browserify : 在运行前对模块进行编译/转译/打包的处理(已经将依赖的模块包含进来了), 运行的是打包生成的js, 运行时不存在需要再从远程引入依赖模块
问:Node.js与Browserify的区别?
- Node.js运行时动态加载模块(同步)
- Browserify是在转译(编译)时就会加载打包(合并)require的模块
# 4.2 AMD
- AMD全称Asynchronous Module Definition,译为“异步模块定义”
- 专门用于浏览器端,模块的加载是异步的
- 没有文件作用域,在define与require函数外部共用全局作用域
# 基本语法
定义没有依赖的模块
define(function(){})
1
定义有依赖的模块
define([module1, module2],function(module1, module2){    //显式声明,依赖注入
    return 模块对象       //将想要暴露的模块对象直接返回
})
1
2
3
2
3
引入使用模块
require([module1, module2],function(module1, module2){
    //使用m1、m2等传过来的模块对象
})
1
2
3
2
3
# 使用
<script data-main="./js/main.js" src="./js/libs/require.js"></script>
1
- 项目目录:
.js
  |---libs
      |---require.js
      |---angular.js
  |---modules
      |---module1.js
      |---module2.js
  |---main.js
|---index.html
1
2
3
4
5
6
7
8
9
2
3
4
5
6
7
8
9
- 使用requirejs
(function(){
    requirejs.config({
        baseUrl: 'js/',     //设置根目录
        paths:{
            module1: 'modules/module1', //后缀js会自动添加,所以不能手动加.js后缀
            module2: 'modules/module2',
            angular: 'libs/angular'
        },
        shim:{
            angular:{
                exports: 'angular'  //对于原生不支持AMD的将第三方对象暴露给window对象的第三方模块需要手动配置暴露的对象名
            }
        }
    })
    requirejs(['module1', 'module2', 'angular'], (m1, m2, angular)=>{})
})()
1
2
3
4
5
6
7
8
9
10
11
12
13
14
15
16
2
3
4
5
6
7
8
9
10
11
12
13
14
15
16
# 4.3 CMD
- CMD全称Common Module Definition,译为“通用模块定义”
- CMD专门用于浏览器端,模块的加载是异步的
- 模块使用时才会加载执行
基本语法
- 下载sea.js, 并引入
- 官网: http://seajs.org/
- github : https://github.com/seajs/seajs
- 将sea.js导入项目: js/libs/sea.js
- 创建项目结构
|-js
|-libs
  |-sea.js
|-modules
  |-module1.js
  |-module2.js
  |-module3.js
  |-module4.js
  |-main.js
|-index.html
1
2
3
4
5
6
7
8
9
10
2
3
4
5
6
7
8
9
10
- 定义sea.js的模块代码
module1.js
define(function (require, exports, module) {
  //内部变量数据
  var data = 'atguigu.com'
  //内部函数
  function show() {
    console.log('module1 show() ' + data)
  }

  //向外暴露
  exports.show = show
})
1
2
3
4
5
6
7
8
9
10
11module2.js
define(function (require, exports, module) {
  module.exports = {
    msg: 'I Will Back'
  }
})
1
2
3
4
5module3.js
define(function (require, exports, module) {
  const API_KEY = 'abc123'
  exports.API_KEY = API_KEY
})
1
2
3
4module4.js
define(function (require, exports, module) {
  //引入依赖模块(同步)
  var module2 = require('./module2')

  function show() {
    console.log('module4 show() ' + module2.msg)
  }

  exports.show = show
  //引入依赖模块(异步)
  require.async('./module3', function (m3) {
    console.log('异步引入依赖模块3  ' + m3.API_KEY)
  })
})
1
2
3
4
5
6
7
8
9
10
11
12
13
14main.js : 主(入口)模块
define(function (require) {
  var m1 = require('./module1')
  var m4 = require('./module4')
  m1.show()
  m4.show()
})
1
2
3
4
5
6
- index.html:
<!--
使用seajs:
1. 引入sea.js库
2. 如何定义导出模块 :
  define()
  exports
  module.exports
3. 如何依赖模块:
  require()
4. 如何使用模块:
  seajs.use()
-->
<script type="text/javascript" src="js/libs/sea.js"></script>
<script type="text/javascript">
seajs.use('./js/modules/main')
</script>
1
2
3
4
5
6
7
8
9
10
11
12
13
14
15
16
2
3
4
5
6
7
8
9
10
11
12
13
14
15
16
# 4.4 ES6模块化规范
- 依赖模块需要编译打包处理
- 浏览器端实现,需要先使用Babel将ES6编译为ES5代码,再使用Browserify编译打包js
# 文档结构
project
  |---js
      |---src
      |---build
      |---dist
  |---index.html
  |---.babelrc
1
2
3
4
5
6
7
2
3
4
5
6
7
# 编译过程
- 安装babel-cli babel-reset-es2015 browerify
npm install -g babel-cli browerify
npm install --save-dev babel-preset-es2015
1
2
2
- 在项目根目录自定义.babelrc文件
{
    "presets": ["es2015"]
}
1
2
3
2
3
- 编写es6模块化语法
常规暴露
- 在src文件夹新建module1.js
export命令规定的是对外的接口,必须与模块内部的变量建立一一对应关系,因此单独暴露时不能只传递变量名
export function foo(){      //单独暴露
    console.log('我是module1')
}
/*
*export {foo}    //统一暴露
*
*/
1
2
3
4
5
6
7
2
3
4
5
6
7
- 在src文件夹新建main.js
/*
*import foo from './module1.js'  //单独暴露时
*import {foo} from './module1.js'   //统一暴露时
*
*/
foo()   //'我是module1'
1
2
3
4
5
6
2
3
4
5
6
默认暴露
- 在src文件夹新建module1.js
function foo(){
    console.log('我是module1')
}
/*
*export default foo         //引入时可以是任意声明变量来引入暴露出去的数据类型
*/
1
2
3
4
5
6
2
3
4
5
6
- 在src文件夹新建main.js
/*
*import a from './module1.js'
*
*/
a()   //'我是module1'
1
2
3
4
5
2
3
4
5
- 在项目根目录使用babel将ES6语法转换成ES5语法
babel ./src -d ./build
1
- 在项目根目录使用browerify将ES6语法中的commonjs转换成普通ES5语法
browerify ./build/main.js -o ./dist/bundle.js
1
- 在index.html中引入最终编译好的js文件
<script src="./js/dist/bundle.js"></script>
1
